Olight X7 Marauder 3*XHP70 9000 Lumen Flashlight
Bundle With 4*18650 Cells and SkyBen USB Light
* Flashlight provided for review courtesy of
SkyBen Trade on Amazon
When SkyBen asked offered me the opportunity to review the new Olight X7
Marauder I gladly took them up on it. With 9000 claimed lumens, this is
one of the brightest mass produced flashlights on the market. Does it live up to
the claims? Is it as good as it looks? Let’s find out.

Olight and SkyBen Trade’s Product Description
Featuring 9000 lumens in a “soda can” sized light to
provide the power of the sun in the palm of your hand. The X7 Marauder carries
three four core light-emitting XHP70 LED’s which are currently one of the
highest performing light sources on the planet. The light features a custom
designed orange peel reflector to create the perfect beam pattern for logical
and realistic use. People ask, why would someone need 9000 lumens? Well the X7
offers 6 modes at various brightness levels going all the way down to 3 lumens
which mimics a small keychain flashlight. The 9000 lumen setting provides a
sensation of daylight when shined in a pitch black environment with a soft tone
so it is not blinding to the eye. The X7 features a groundbreaking active
thermal management system. The MCU detects the flashlights internal temperature
in real time to prevent overheating to the user’s hand and flashlight
FEATURES
• Uses three top-class cool white CREE XHP 70 LED with a total of 12
light-emitting cores.
•A maximum output of 9000 lumens which is great for strong illumination and
minimum output of 3 lumens, which is suitable for long periods of using at
night.
•The switch on bezel side controls the flashlight, which has three common
brightness levels: 3000 lumens, 1000 lumens and 300 lumens; plus turbo modes:
5500 lumens and 9000 lumens; nightlight mode: 3 lumens; and a strobe at 10Hz.
•Double press the side switch quickly to activate the Turbo (5500 lumens) mode,
and double press quickly again to access the Turbo S (9000 lumens) mode.
•Low-voltage indicator monitors the battery power level while the light is on,
which will glow red when the battery power is running low.
•Active Thermal Management: MCU detects the flashlight temperature through the
internal thermal sensor in real time, and prevents overheating by reducing the
output.
Package Include
Holster;Instruction Manual;Car Sticker;Skyben USB light,4*3500mAh 18650
Batteries
Bundle w/Batteries Price: $234.98
Bundle w/o Batteries Price: $170.39
This product has the following specifications (ANSI/NEMA
FL1-2009 Standards):
Max Output (lumens) 9000
Low (lumens) 3
Max Run Time (hours) 30 days
Beam Distance 313 m
Peak Beam Intensity 24,500 cd
Water Resistance IPX8 (waterproof up to 2 meters)
Impact Resistance 1 m
Head Diameter 2.68 in. / 68mm
Length 5 in. / 127mm
Battery Type 18650
Weight (oz) 16.6000
Pocketclip No
User Manual Yes
PERFORMANCE
The X7 Marauder bundle comes with 4 high drain Olight 3500mAh 18650 cells.
I tested with those cells at 4.2V as well as with Samsung 25R 18650
cells to see if there is any difference in output. There wasn’t and I
achieved the same results with either type of cells installed. In this
aspect, the Olight cells performed well, once they were performing correctly
(see my notes in my Conclusion section at the bottom of the review. Testing is performed
according to ANSI/NEMA FL1 standards. OTF lumen testing is done with my
calibrated Integrating Sphere. Lux and Throw are measured from 8.9m and
converted back to 1m.
Back to the Output testing…
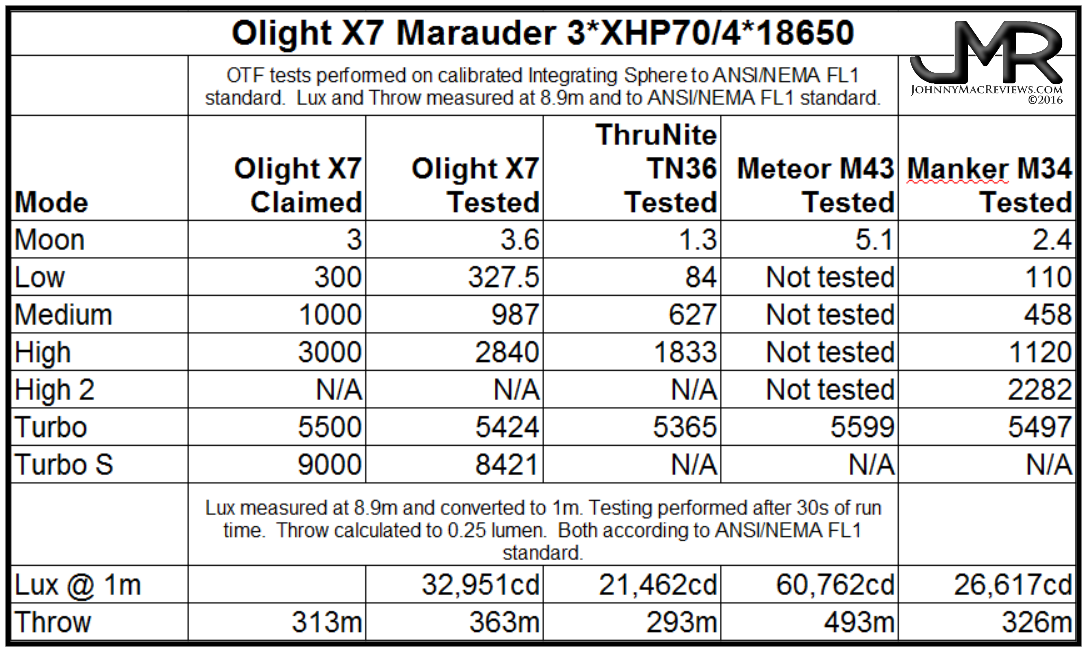
My testing is performed on a calibrated Integrating Sphere for OTF lumens.
Turbo readings are taken after 30 seconds of On time according to ANSI/NEMA FL1
standards. Lux and Throw measurements are taken at 8.9m distance and
converted back to 1m. Readings are taken after 30 seconds of runtime based
on ANSI/NEMA FL1 standard. All cells are fully charged to 4.2V and only
high drain cells are used in testing.
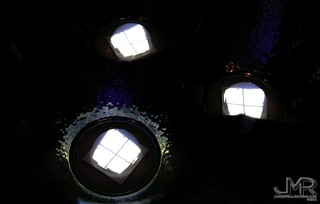
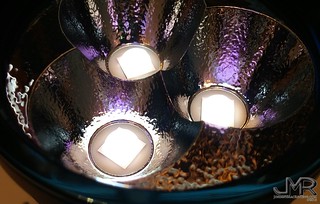
Beam Shots
^ I chose to compare the Olight X7 with the most similar lights I own at the
moment. I have 3 Niwalker lights coming tomorrow but unfortunately the one
that is not included in the 3 is the only light that would have come closest to
the Olight X7, the Niwalker MM25MB with 7800 lumens. Oh that it was one of
the three. Oh well. The 4 lights I am comparing are within 100 or so
lumens of each other in Turbo mode but make those lumens by very different
means. It’s the Turbo S mode in the X7 Marauder that puts it over the
other lights here. The only one that puts more lumens in a given point is
the Meteor M43 with its tight hot spot but at the expense of spill thanks to its
dedomed emitters. In overall lumens the X7 is still the new boss among
these four lights. Below is what they look like at their highest output
settings.

^ I had to shoot my beam photos in the back yard and didn’t think it would
matter since they are all basically flood torches. What I didn’t plan on
is my camera not being able to handle the massive light they produce. I set my
manual camera settings as best I could but 1 second exposure, its lowest long
exposure, was still too much. They don’t look this intense in person but
you can still appreciate the differences in output between the four lights.
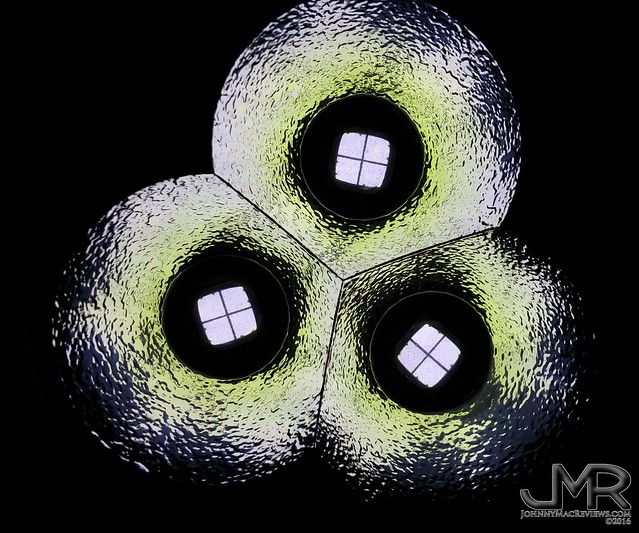
^ The animated gif above is one I took a few weeks ago when I first received
the X7. It includes the 4 lights above plus a few others.
USER INTERFACE
The UI on the X7 Marauder is pretty much like all the “S” model lights they
have which also means it’s a damned good one and one of my favorites. The
single electronic switch controls all output settings.
In a very pleasant surprise, the X7 contains a nice Low that is nearly a Moon
low. One of my complaints about the R50 Seeker was a lack of Moon low in
such a small EDC style light. One reader took offense at my complaint and
defended the lack of Moon low on the R50 being a Search and Rescue light and
therefore shouldn’t have Moon low. Now the X7 IS a Search and Rescue light
but Olight decided (very wisely) to add a Moon low to it. This makes the
X7 so much more useful than the R50, especially as a camp light and around the
house..
From OFF
- Long press activates the X7 in Moon low
- Quick press activates the X7 in the last mode used (memory) Only Moon,
Low, Medium, or High are memorized when light is switched Off.- Both Turbo and Turbo S are supposed to be memorized as “High” mode
but only for 10 minutes of Off time after which point “High” mode
reverts to actual High mode. I was unable to make this happen and,
IIRC from another review of the X7, this is not uncommon.
- Both Turbo and Turbo S are supposed to be memorized as “High” mode
- Double-click activates Turbo. Double-click again to activate Turbo
S mode. - Triple-click to enter Strobe mode
From ON
- Single press from any mode turns the X7 Off
- Press and hold cycles between Low, Medium and High. Release when
mode wanted is active. - Double-click to enter Turbo. Double-click again to enter Turbo S
mode
Electronic Lockout
- To Lock: Press and hold the switch. It will enter Moon low but
continue to hold and it will turn off (about 2 seconds).- Once in lockout, pressing the switch will engage Moon low for half a
second then it will go out again.
- Once in lockout, pressing the switch will engage Moon low for half a
- To Unlock: Press and hold until Moon low comes On then goes out
then comes on again (about 2 seconds).
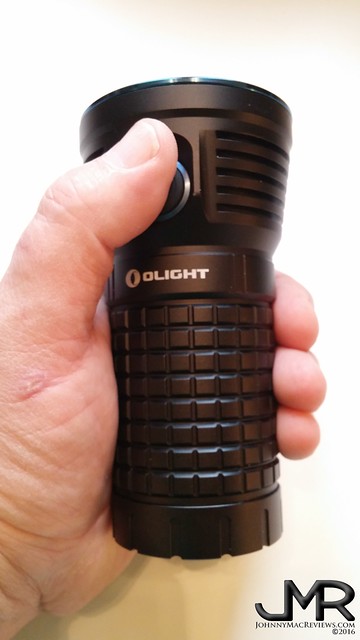
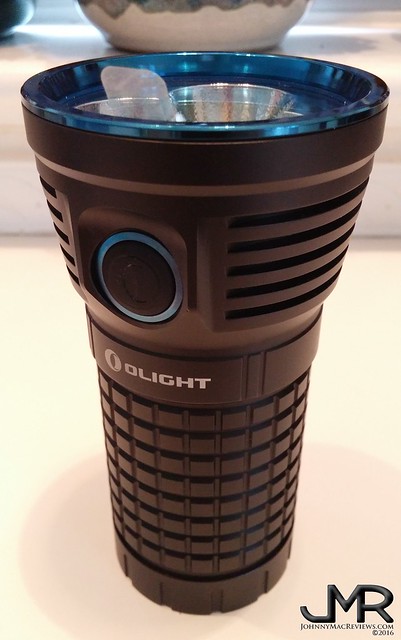
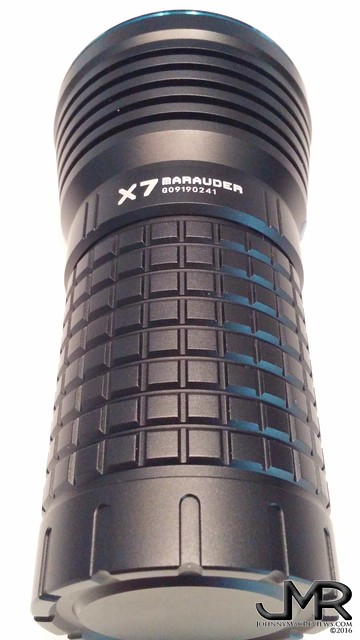
^ The X7 feels good in the hand. Everything about the light looks and
feels like a scaled up version of the smaller “S” series lights. Unlike
the R50 Seeker, the switch on the X7 is extremely easy to locate by feel.
It’s location near the very front of the light makes it very comfortable with my
thumb falling right on the switch. The switch itself has nice feel
to it with just the right amount of tactile pressure and feedback. The
whole light feels like it’s made from one large block of aluminum. Simply
an impressively solid little light. It’s also much smaller in person than
it looks like it would be from photos of it. It’s about the same size of
one of it’s main “wall of light” competitors, the Thrunite TN36.
A CLOSER LOOK
Let’s go in for a closer look to see just what you’ll get with the Olight
X7.
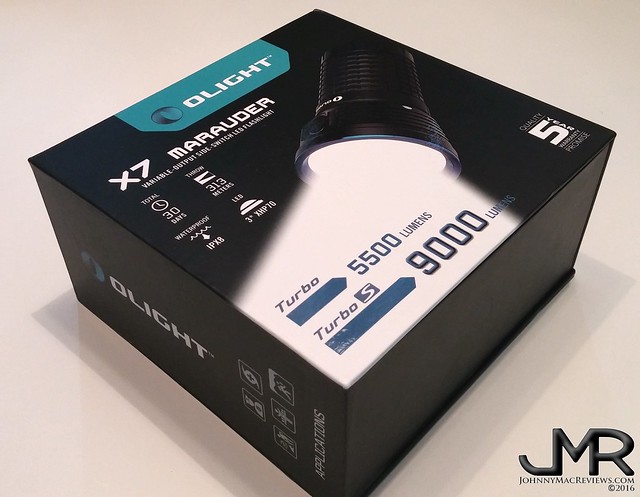
^ The X7 Marauder arrived in a sealed, beautiful presentation box with
large, easy to open lid and magnetic closure.
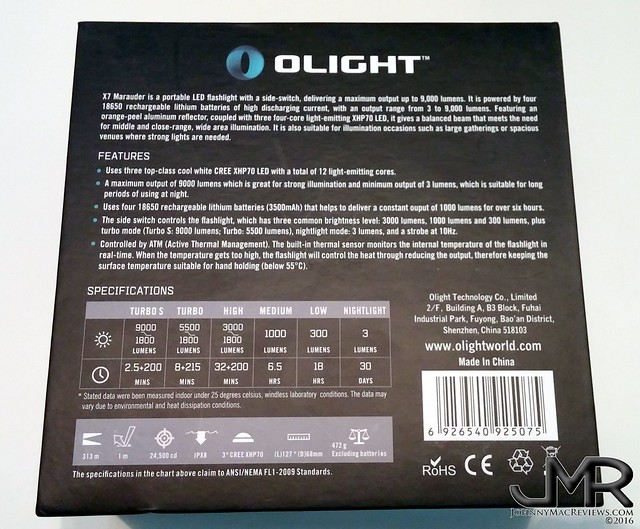
^ The back of the box lists the light’s features and output specifications.
One thing I really respect about Olight is they acknowledge that output ratings
utilize a step-down from the highest mode(s) and aren’t afraid to list these
changes in output and runtime. All flashlight manufacturers use these
step-downs (based either on time or thermal temps) but very few openly admit it
and use it in their marketing.
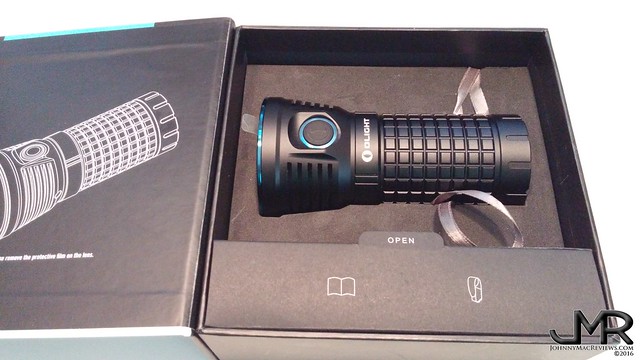
^ Opening the box you will find a very firm, precision fitted foam liner
that holds the X7 perfectly. To make it easier to pull the light from its
packing, it even includes a ribbon that when pulled will lift the light from
it’s fitted slot. All accessories are located in the inner box below the
light. All together it’s the kind of packaging one should expect from a
light that is not exactly inexpensive. It reminds me very much like a new
smart phone packaging from Samsung of Apple.
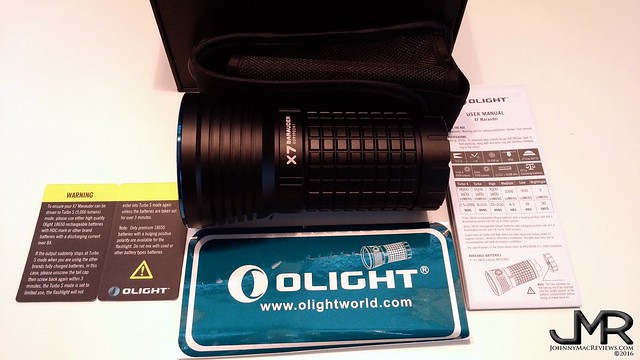
^ Inside the accessory box you will find a very nice nylon holster, warranty
card, “Olight” sticker, and user manual.
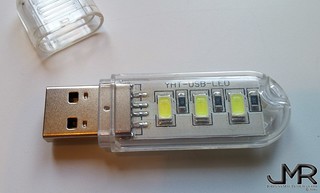
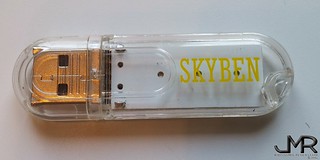
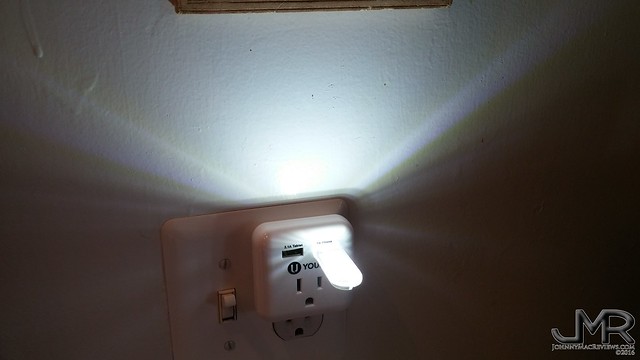
^ When you buy the package from SkyBen.Trade they include their little USB
light. Makes a handy little night light when plugged into a wall wart.
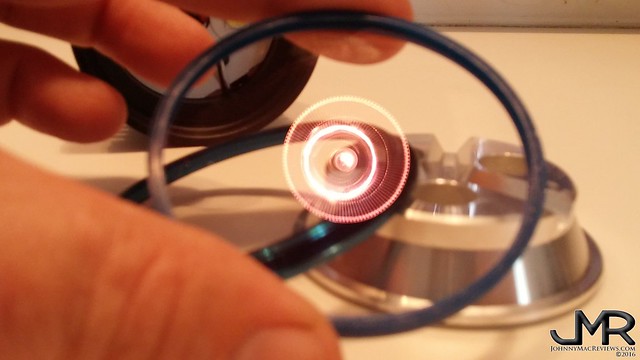
^ Also like a cell phone, there is even a protective film over the glass
that most of us love to remove on a new phone. It’s a cool little touch
that means your new X7 should be free from finger prints. Just grab that
little tab visible in the photo above and peel off the protective film.
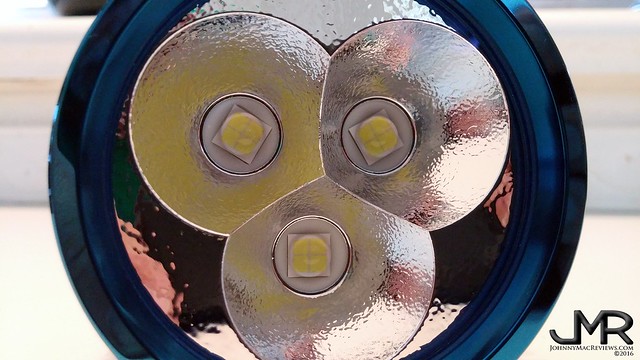
^ These three cool white Cree XHP70 emitters sit in the center of three
overlapping 29mm HOP reflectors.
^ With the film removed from the Ultra clear, double-sided AR coated lens,
the lens is nearly invisible.
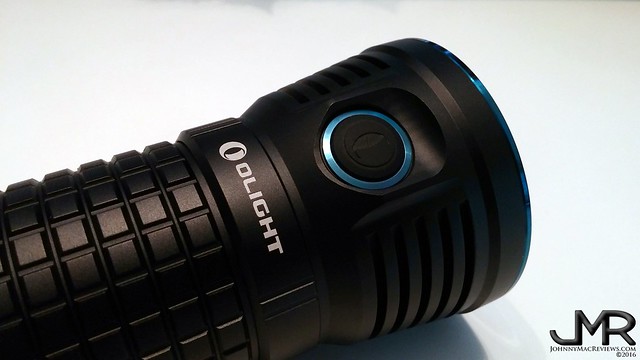
^ The blue anodized Stainless Steel lens and switch bezels carry on Olight’s
now classic styling cues. I love the look of the cobalt blue trim against
the satin black anodizing. The anodizing, BTW, is absolutely flawless with
no bare spots of discolorations.
The electronic switch has a nice little raised “Olight” logo on it that makes
it easier to locate by feel than the perfectly smooth, flat switch on the R50
Seeker. Also making it easier to locate switch is the raised section where
the switch is located coupled with a protective recess where the switch is
located. This allows for super easy finding of the switch in the dark
while still helping prevent accidental activation when stowed.
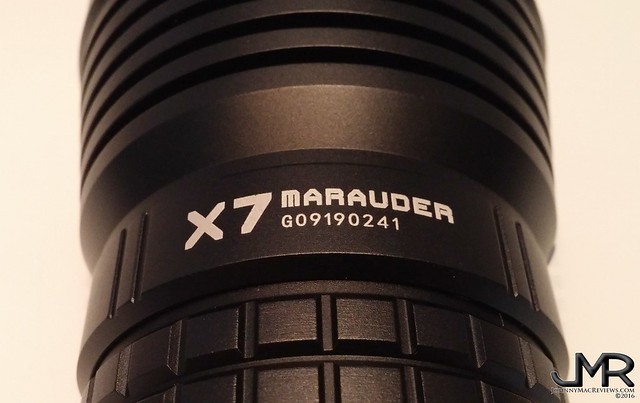
^ All engraving on the Olight X7 is crisp and bright white. Below the
model name is the Serial Number of the light.
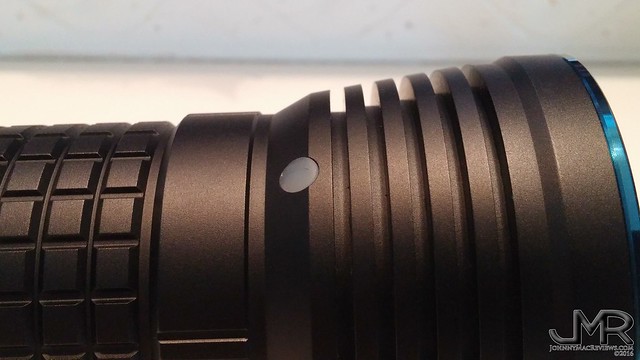
^ Located 90 degrees to the left of the switch is a flush covered LED that
gives battery warning for low voltage. There is actually nothing in the
User Manual about this little feature. Lots of cleanly machined fins help
manage the heat produced by the big emitters.
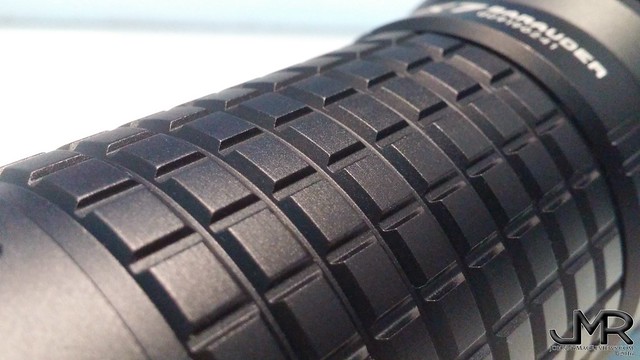
^ Knurling on the X7 is a scaled up version of the square design Olight is
known for.
^ The smooth lines make it easy to slide the X7 into the included holster.
The tube is as thick as one would expect for 4 cells arranged in parallel (2S2P
actually) but it’s still very easy to hold and quite comfortable.
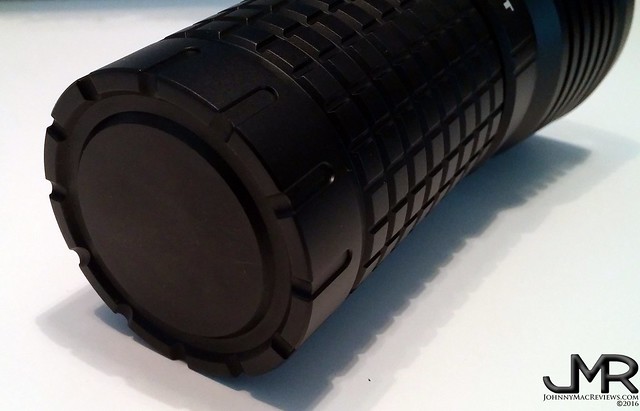
^ The tail cap of the light is very smooth and flat. It tail stands
perfectly and is rock solid.
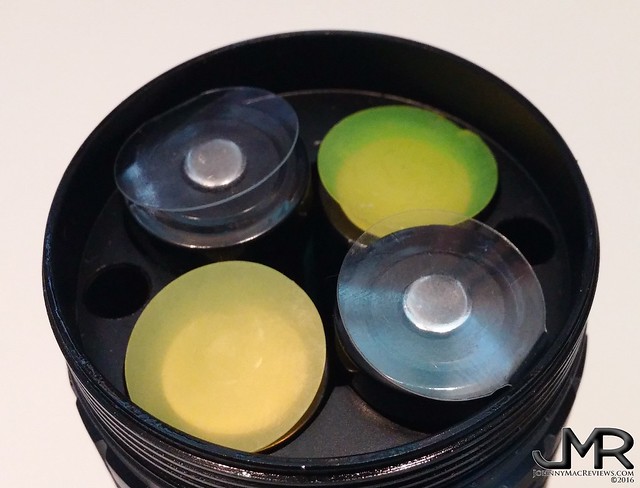
^ Unthreading the tail cap for the first time reveals the included
high-drain Olight cells. The green and clear plastic disks are installed
at the factory to insulate the electric current in the light so that the cells
do not experience any parasitic drain from the electronic switch as well as
making it impossible for the light to turn on during shipment.
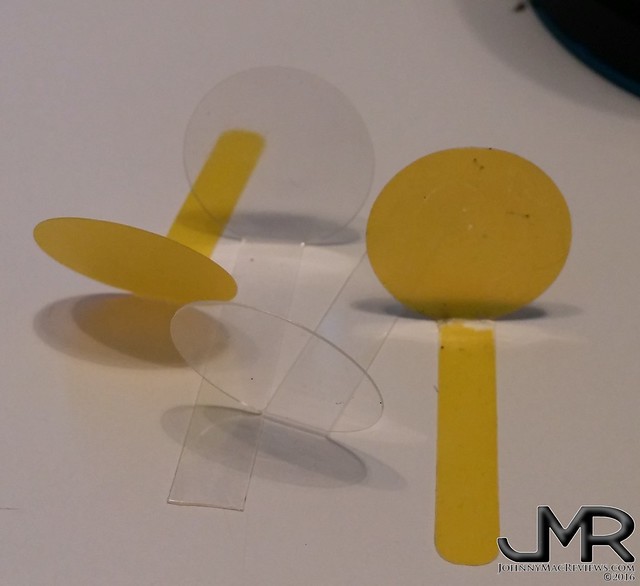
^ Simply pull out and discard these disks. You will not need them
again.
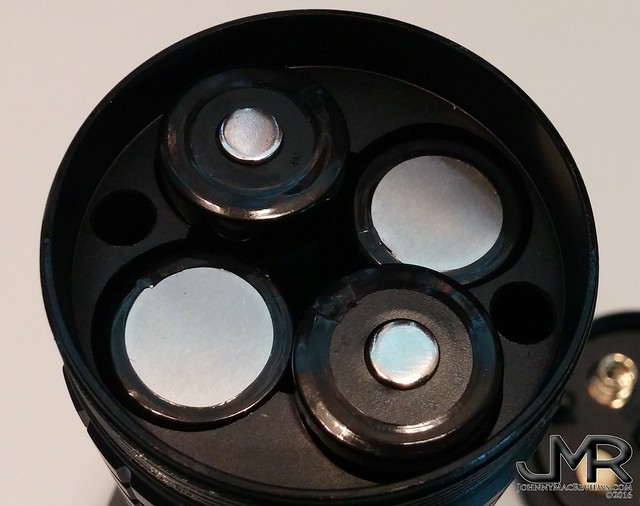
^ The X7 Marauder doesn’t use a battery cartridge. This saves a bit of
space as well as making fewer contact and resistance points that could inhibit
current flow. The 18650 cells are arranged in a 2S2P formation. The
two small holes visible above are for the locating pins in the tail cap.
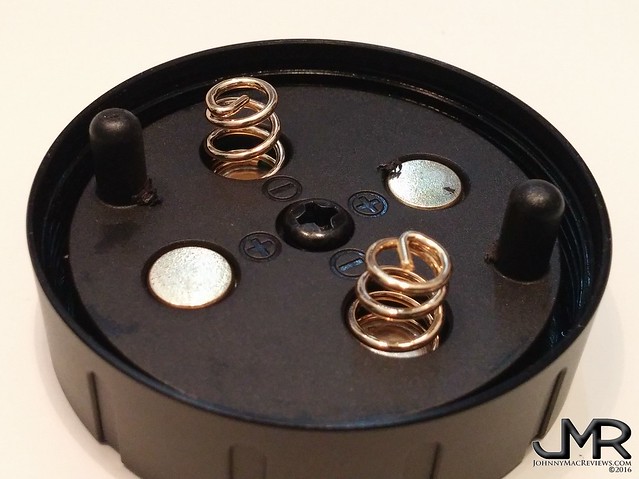
^ The contact PCB in the tail cap is attached to the tail cap by the center
screw. This allows the tail cap to spin freely while the guide pins in the
PCB keep the anode and cathode contacts in proper orientation with the cells.
The positive contact plates above are the ones that I needed to clean in order
to get Turbo S mode functioning. The plastic burr visible in the picture
was only there after opening the light for the first time. It was not
there while I was experiencing issues prior to wiping off the contacts.
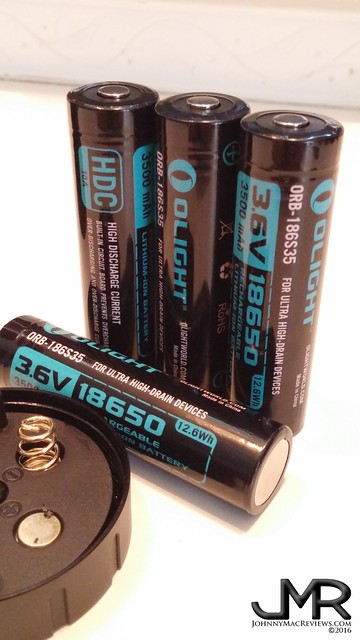
^ These are the high drain 18650 cells that Olight includes with the bundle.
They are 3500mAh capacity and appear to be protected. They are also not
listed for sale separately on Olightworld.com as of the writing of this review.
While I highly recommend the X7 and getting it from SkyBen.Trade, I cannot
recommend getting the version bundled with Olight’s cells. I’ve had issues
with the light not staying in Turbo S mode for more than a split second before
it drops down to High. Every time is with the Olight HDR cells. When
I use my Samsung 25R cells the light works great.
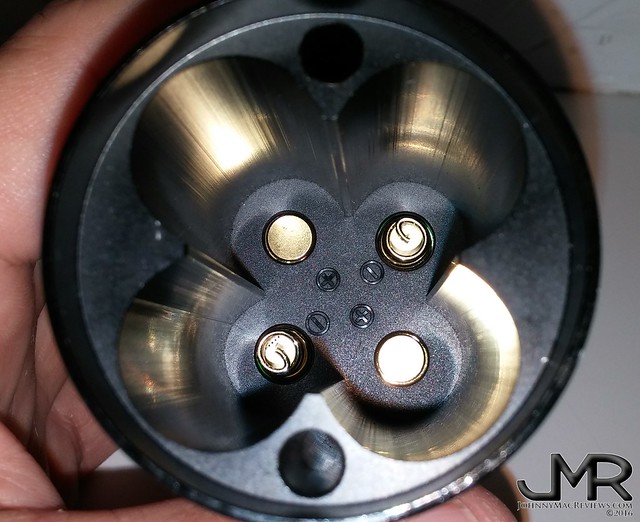
^ A peek inside the battery tube to the contacts at the head of the light.
The recessed anode contacts mean that only button headed cells will work
with the X7. This is how it protects against reverse polarity should you
put the cells in incorrectly. Only high drain INR/IMR cells are recommended for use due to
the high current draw the light places on it’s cells.
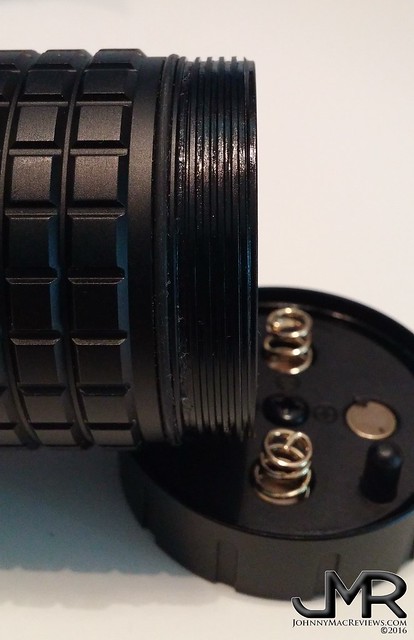
^ Threading for the tail cap is very nice. The threads have very
little play between them and the O-ring seals tightly with the tail cap.
They also came prelubed from the factory.
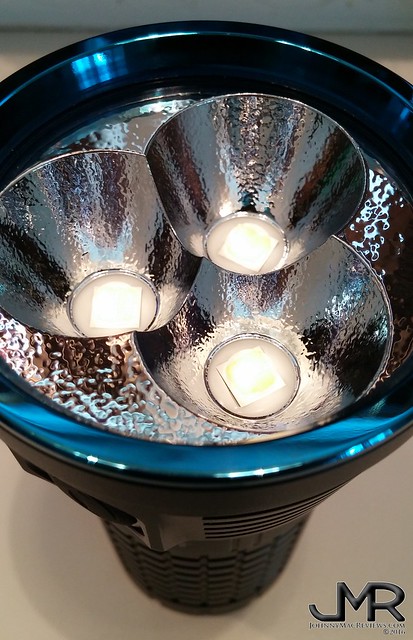
^ Let’s take a last look at the big LEDs before we open up the head and have
a peek inside the light.
^ The emitters aren’t perfectly centered but close. One is just a bit
off center (lower right in pic above). It doesn’t effect the beam at all.
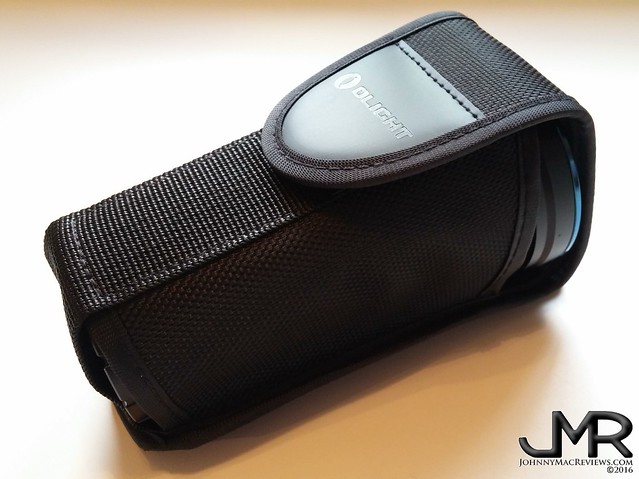
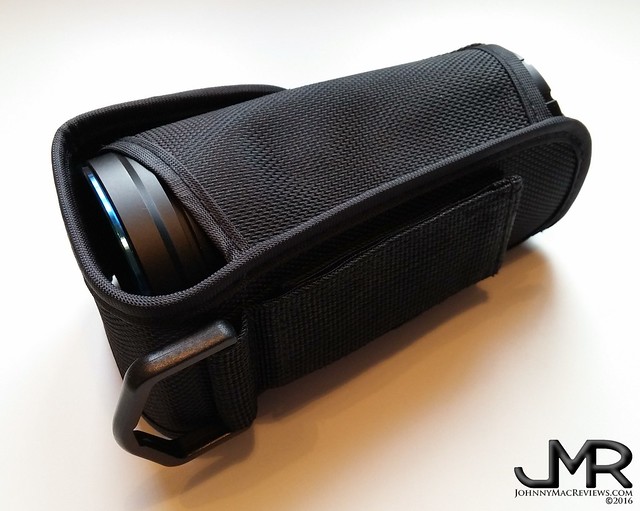
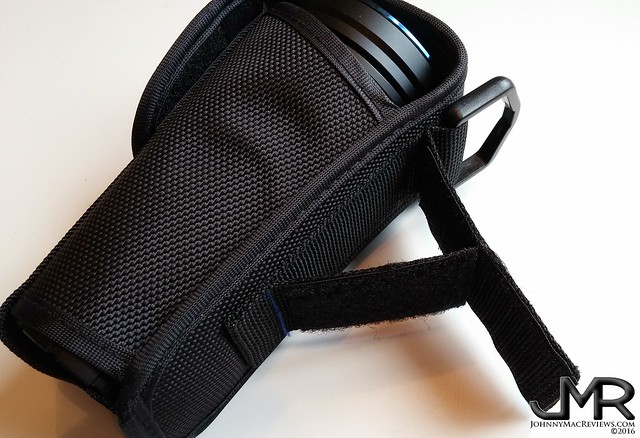
^ The included holster is extremely nice and fits the X7 perfectly. The
quick detachable belt closure is very secure.
DECONSTRUCTION
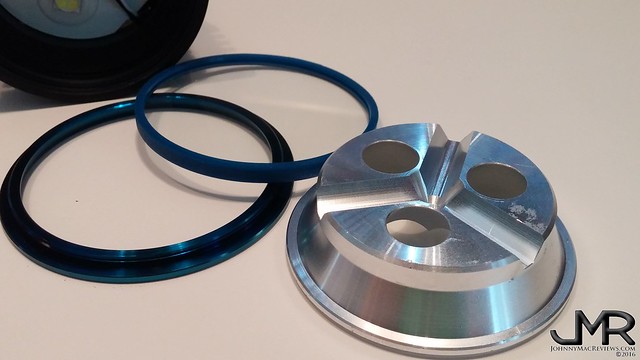
^ Unthreading the blue anodized SS lens bezel exposes a very nice system for
sealing the light tightly against water and dust intrusion.
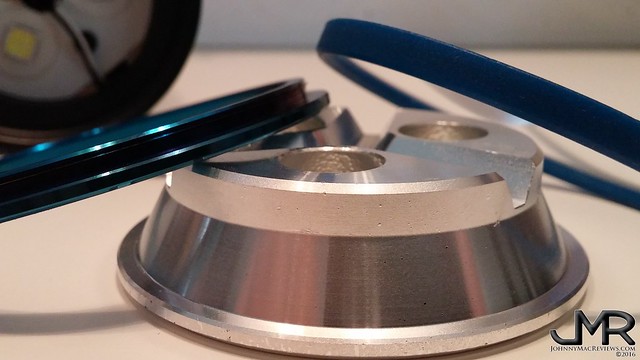
^ There aren’t a lot of threads on the bezel itself but they are fine and
thread properly and easily on or off the head of the light. The reflector
cup is machined from a large piece of aluminum.
^ The AR coating on the lens is visible here.
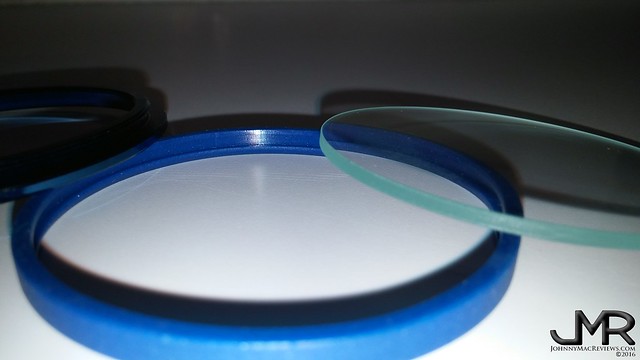
^ The lens is encased on all three sides by a nice, thick C-ring (no, that
that kind of “C” ring!) or U-ring. It completely cushions the glass lens
from impact on all edges and seals tightly between bezel and reflector.
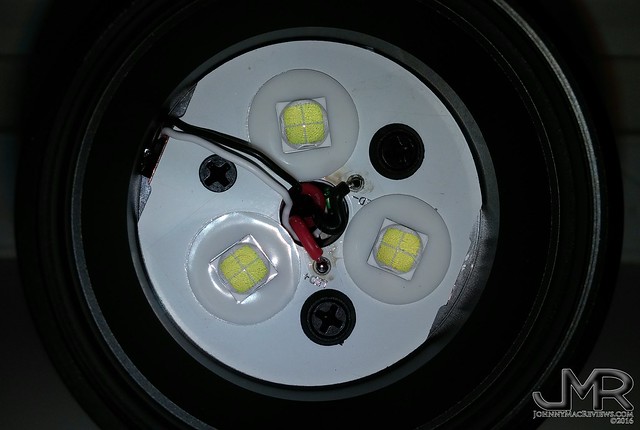
^ A thick copper MCPCB holds the three Cree XHP70 emitters. Each
emitter is rotated different from the others. This helps reduce the dark
crosshair seen in some lights with the XHP LEDs. All wiring comes up
through the center. Two thicker wires direct current to the LEDs and the
two thin wires lead to the electronic switch. A plastic insulator ring
surrounds each emitter . Two larger screws secure the plate to the emitter
shelf below and the third, smaller screw is, I believe, to secure the thermal
sensor that monitors heat from the hard driven LEDs.
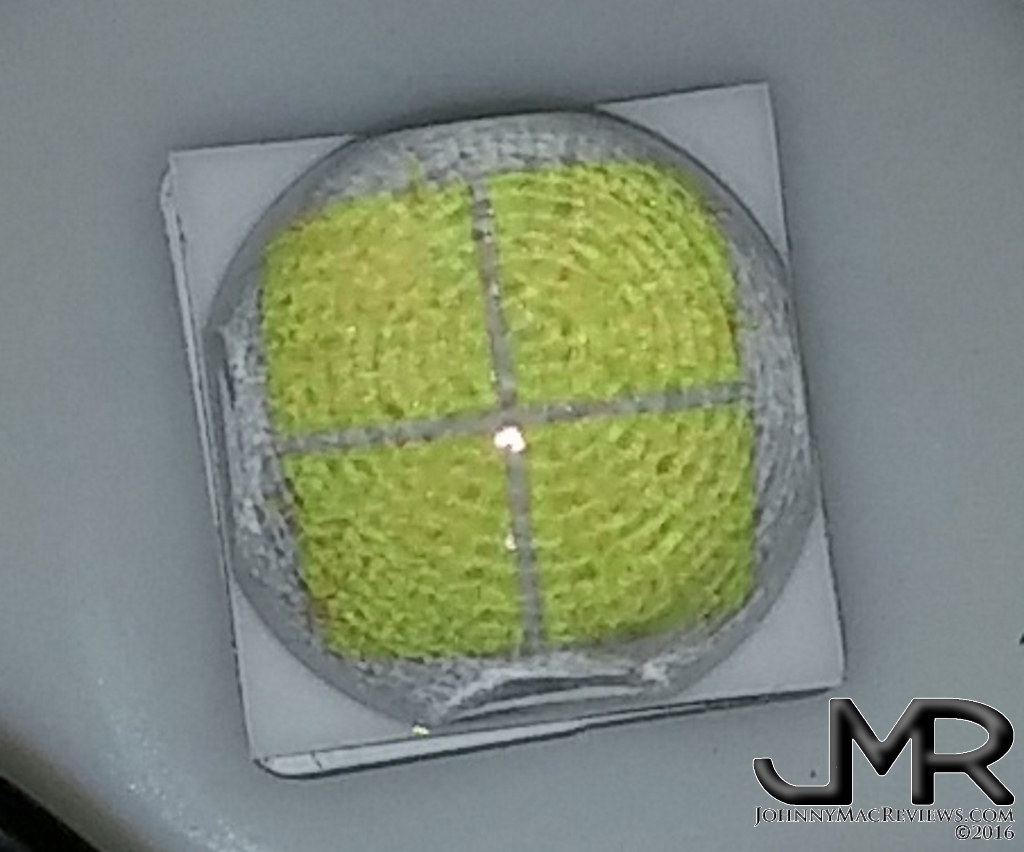
^ At no point do I ever see the dreaded “cross hair” pattern caused by the
thin gap between the 4 individual LEDs that make up each of the large XHP70
emitters. In addition to each of the three LEDs being at slight different
angles, I noticed that there is a ripple texture on the LED domes. It
looks almost like a Fresnel texture and I’m sure it is there to eliminate the
dark cross hair pattern seen on the early XHP emitters. I never noticed
this pattern on any of my other XHP lights. I’ve seen rough texture before
but not this rippled texture. I do like it a lot
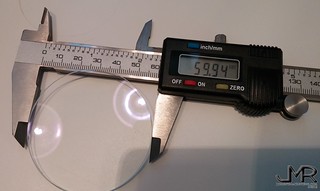
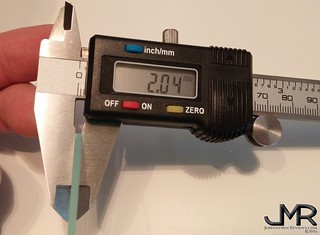
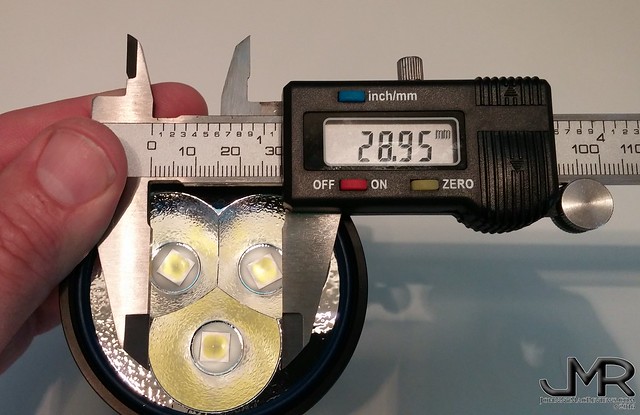
^ The lens of the X7 is 60mm x 2mm and each reflector well is 29mm across.
They appear to be a little wider and slightly deeper than those on the Thrunite
TN36.
COMPARISON
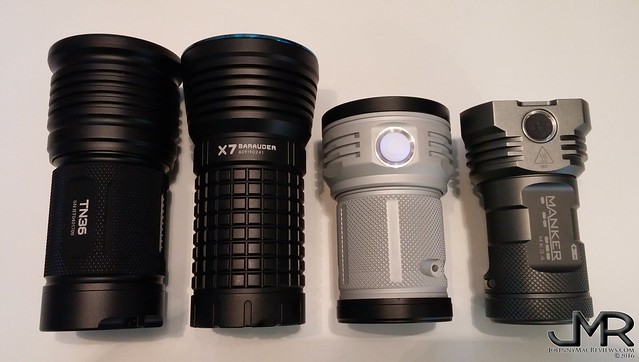
I chose 3 other lights with which to compare the X7 Marauder. All 3 are
known as being some of the brightest flood flashlights on the market.
From left to right they are:
Thrunite TN36 (3*MK-R NW/4*18650)
Olight X7 Marauder (3*XHP70 CW/4*18650)
Noctigon Meteor M43 (4*3 XP-G2 S2 dedomed/4*18650)
Manker MK34 (3*4 XP-G3/3*18650)

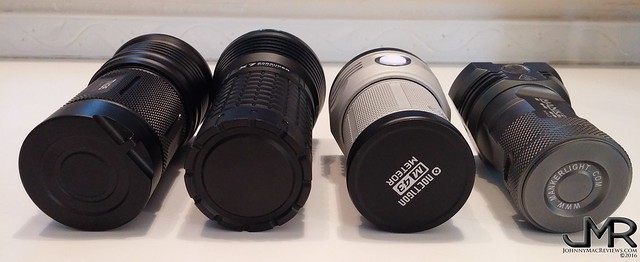
^ The length and width of the two larger lights, the TN36 and X7, are nearly
identical but the battery tube on the X7 is a bit thinner due to the lack of
cell carrier which the TN36 uses. It makes the X7 feel just a bit smaller
and more compact than the TN36. The squat, fat little M43 and tiny little
MK34 make their crazy lumens by using 12 smaller LEDs. Each of these four
lights use what are essentially 12 XP-G sized LEDs. Both the XHP and MK-R
emitters are comprised of 4 smaller LED dies mounted onto a single substrate.
Obviously the two smaller lights have far less mass and will heat up much
quicker than the two larger lights.
CONCLUSION
An interesting side note here, regarding one of the reasons I like dealing
with Skyben.Trade on Amazon. My sample light had an odd issue where when
entering Turbo S mode the light would brighten for half a second them
immediately dim back down to Turbo mode. Frankly I was frustrated and
ready to give up on the light but I contacted SkyBen to ask if they’ve ever seen
this behavior before. For all I knew I was doing something wrong but I
didn’t think so. Long story longer, I spoke with Glennis at SkyBen and she
instantly told me to wipe clean the positive contacts in the tail cap of the X7.
What? I looked at them and they were spotless, besides, how could that
possibly resolve Turbo S mode not staying on? Either it runs or it
doesn’t. I fussed with the light some more with no results, even testing
with different cells thinking the ones bundled with the light were not up to the
task of Turbo S mode, then finally decided to try what Glennis suggested and
clean the positive contacts in the tail cap. I wiped them with my shirt
and they looked exactly the same. I screwed the tail cap back on the X7
then fired up Turbo S mode. Holy crap! It worked like a charm and
has been performing flawlessly ever since (or so I thought). I’ve never
seen such a thing. I contacted Glennis again and asked how in the world
she knew this little trick and she informed me that my X7 is not the first one
she’s seen with this issue. The moral of the story: The folks at
SkyBen seem to know their stuff and, if you get an X7 and the Turbo S mode stays
on only briefly, wipe off the positive contacts on the tail cap to fix the
issue. Must be some type of oily coating on the contacts that limited
current throughput enough to cause Turbo S to fail.
What was an interesting side note has become a full fledged issue and it’s
existence means that I cannot recommend the Olight X7 Marauder with the Olight
HDR cells based on my sample which appear to be defective. Last night I
prepared to take my final batch of beam shots and in doing so the Turbo S mode
was failing to work again. I cleaned the tail contacts as before and it
did not resolve the issue. I decided to clean the contacts in the head of
the light as well which did the trick and Turbo S worked for my beam shots.
This morning while going through the UI to finish up this review I found that
after sitting overnight the Turbo S failed to work AGAIN! I cleaned the
tail cap contacts yet AGAIN but this time Turbo S is still not working.
Due to the problem of getting down to the contacts by the head to clean them
(very difficult to do thanks to tight space) this has turned from what I
originally considered a fluke nuisance to a full blown issue. Since every
review I’ve seen or read has not reported this issue I must assume that my
either my light
is defective or the cells are defective. I’ve ensured the cells are fully charged but even at half
charge the Turbo S works on other samples owned by other reviewers. The first time this happened to me I hadn’t tried it with other cells as I’m a stickler for testing with what is provided, but this time I swapped out the Olight branded cells for my 25R cells and low and behold it works just fine. Put the Olight cells back in and the light doesn’t work in Turbo S mode again. Put back the Samsung cells and it’s perfect. Looks like the Olight cells are pretty
much crap in my opinion. I believe there is a protection circuit in them
that is causing the issue. This is pretty much why I always prefer to
provide my own cells and never use protected cells in any of my lights.
Here is a demonstration of what is happening with the Olight cells:
So what is my final opinion on the Olight X7 Marauder? It kicks some
serious floody @ss. Build quality is fantastic. Fit and finish are
perfect. OTF performance is pretty close to what is claimed and it’s Throw
distance is even better than claimed. Just don’t get it with the Olight
cells. They don’t work well with the light. Stick with proven cells
like the Samsung 25R/30Q, some of the new LG cells that are high draw, or any
good IMR cells. Just remember to get button topped cells as the reverse
protection is mechanical and flat topped cells won’t reach the contacts. I
love the light but hate the frustration caused by the questionable cells that
came with it. Fortunately the version without the cells is more
affordable. Win win!
Update 20161107: Olight sent me a set of replacement cells for the X7 and with them the light functions perfectly. Tested it with my new 30Q and it worked great. Popped in the new cells from Olight and it worked great. Popped in the original cells that came with it and it won’t stay in Turbo S. Definitely an issue with the cells and not the light itself. Per Olight’s request I am shipping the old cells back to Olight for testing.

Pingback: Olight X7 Marauder | Johnny Mac Reviews